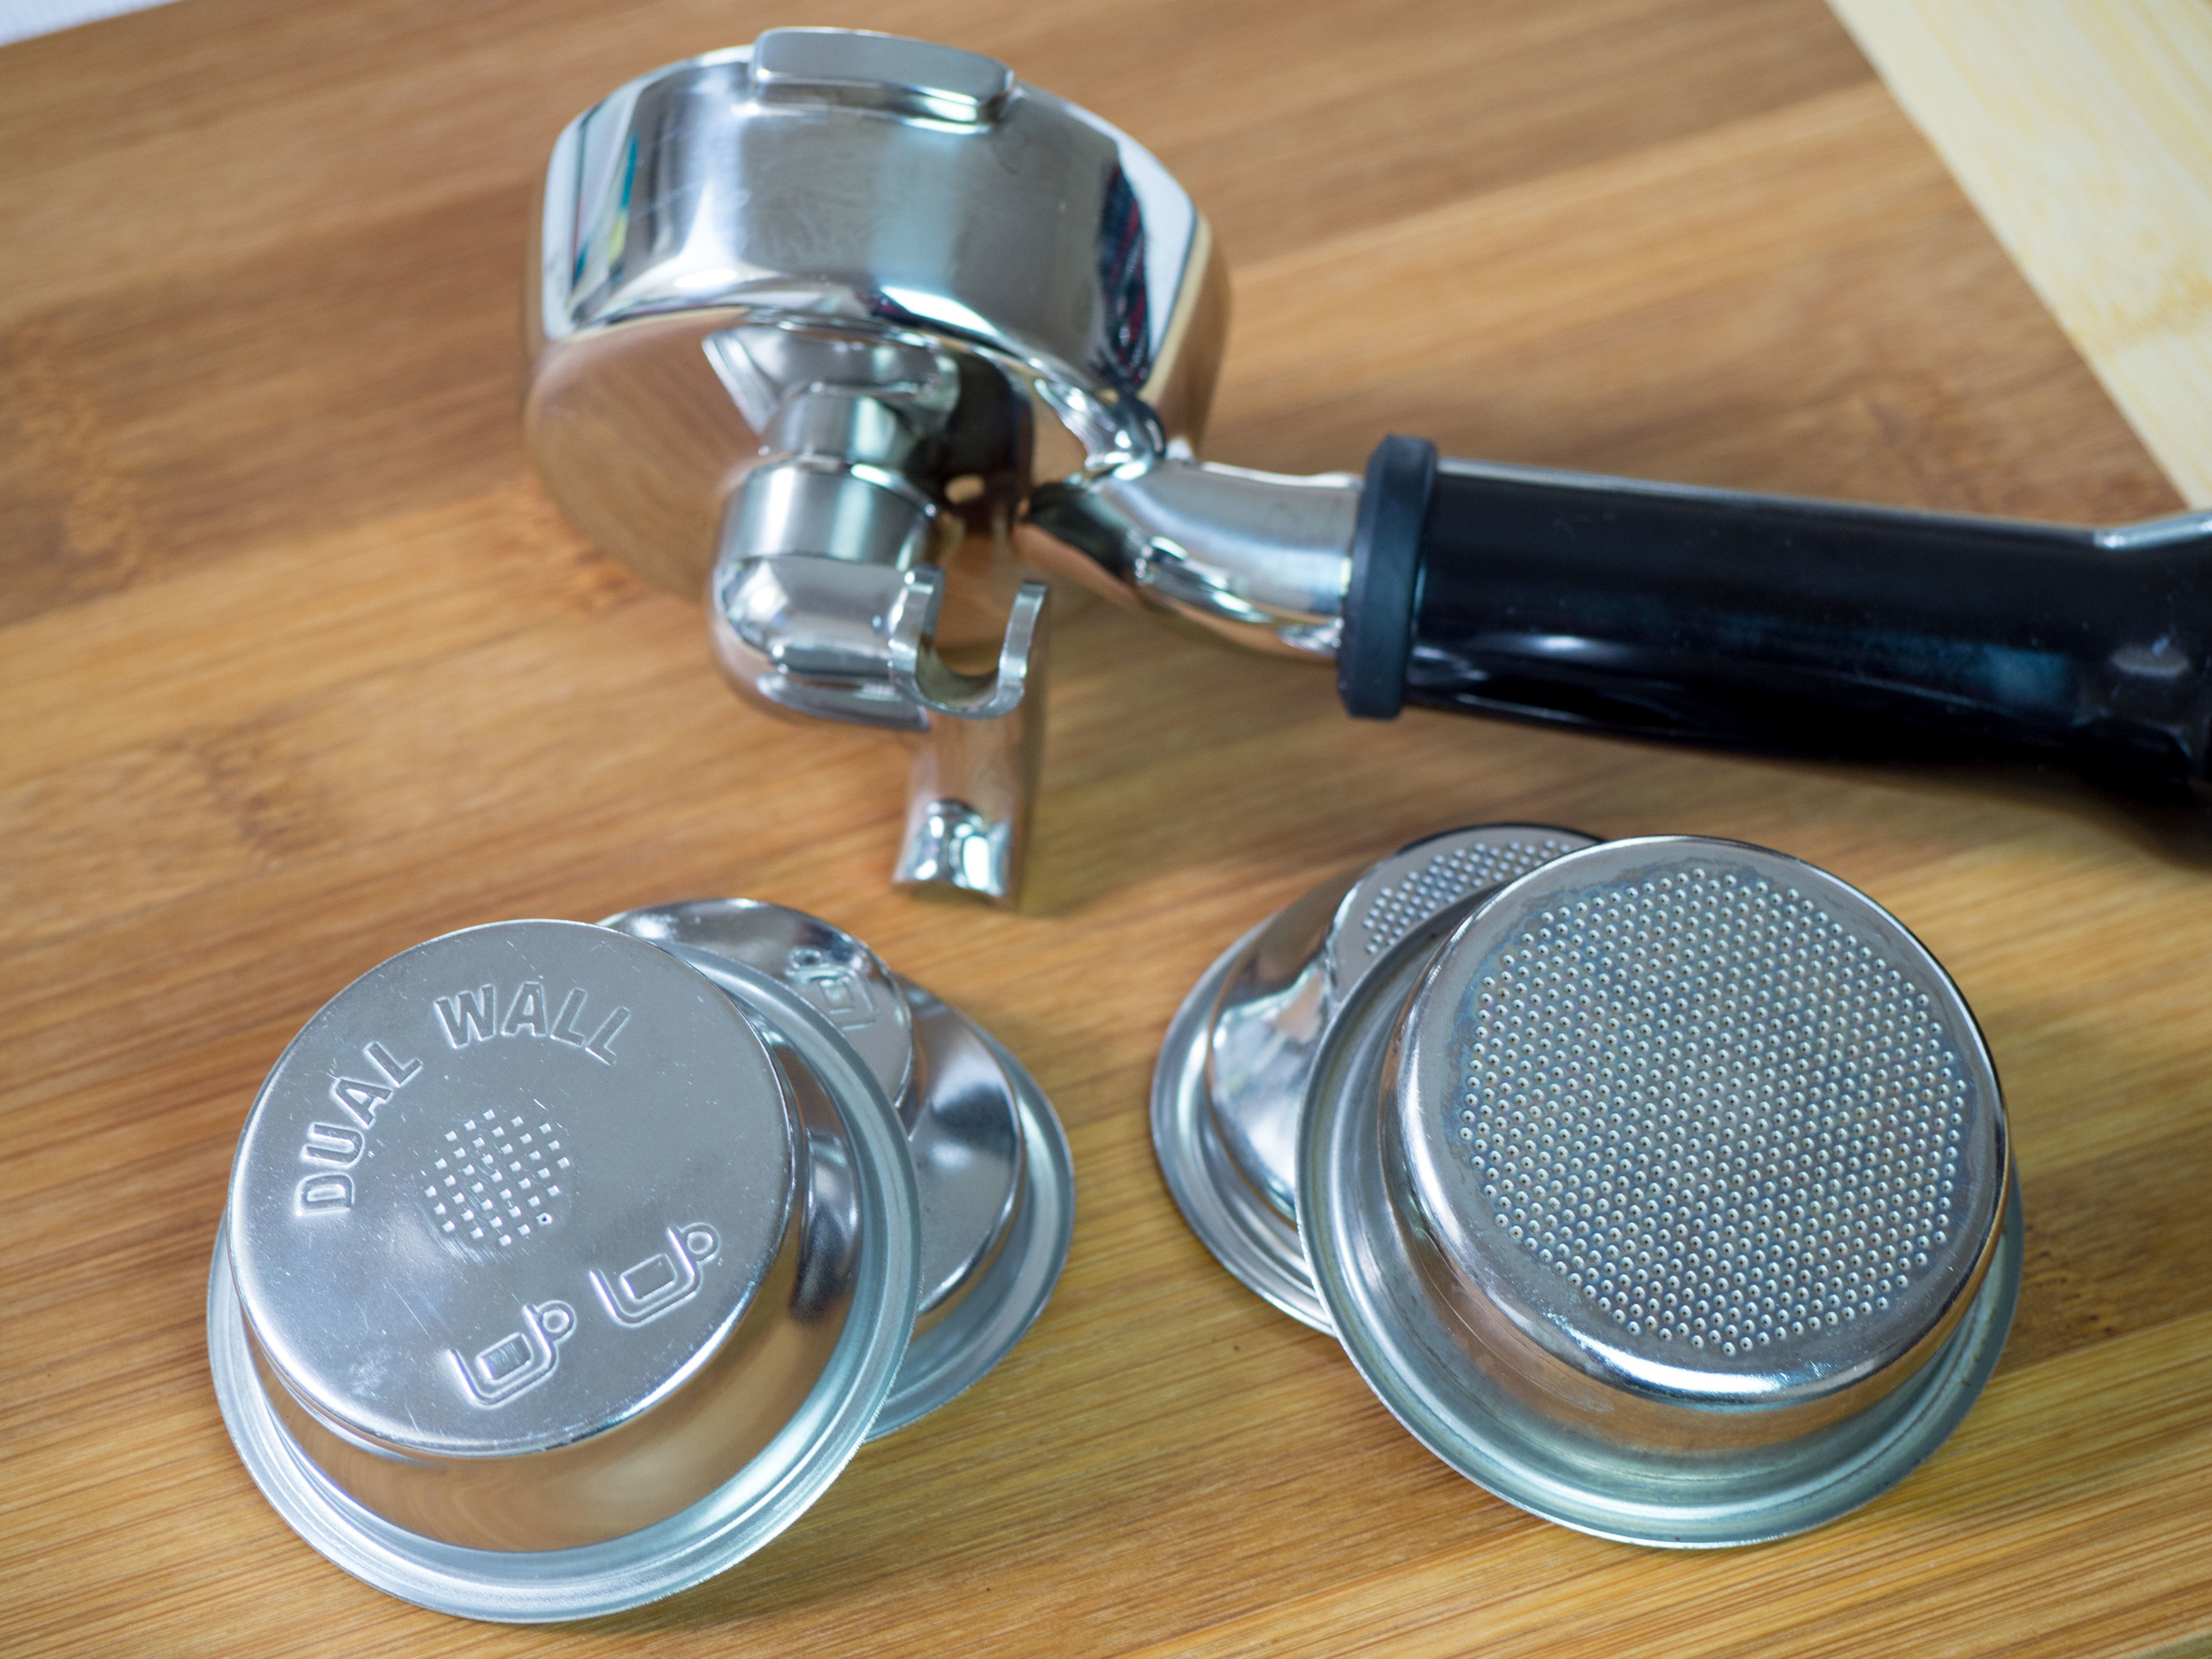
When I first started using my Breville (or Sage) espresso machine, I was filled with excitement and anticipation. I had read so much about the art of pulling espresso shots, and owning my own machine felt like the perfect step toward becoming a home barista. However, I quickly realized that crafting the ideal single shot was far from simple. Initially, I thought I could just halve the coffee dose of a double shot, but it turns out that pulling a perfect single shot required much more finesse, attention to detail, and, most importantly, patience. My machine came with two different filter baskets: one for single shots and another for doubles. While pulling a double shot was relatively straightforward, perfecting the single shot took more careful adjustments and practice. Get a detailed look at the precision and features in our Breville Dual Boiler BES920XL review
Key Differences Between Single and Double Baskets
One of the first things I noticed was the clear distinction between the single and double baskets. The single basket has a slightly tapered, conical shape, while the double basket has a flat base. This seemingly minor design difference actually plays a significant role in how the water flows through the coffee grounds. Learn about the sleek design and functionality in our Breville Barista Touch Impress review
The narrower base of the single basket means that water tends to flow more freely through the center of the grounds. Unfortunately, this can lead to uneven extraction, a phenomenon known as "channeling," where parts of the coffee are under-extracted and others are over-extracted. As a result, my initial attempts at pulling single shots yielded weak, thin, and unbalanced flavors. Compare performance and usability in our Breville Barista Express Impress vs Pro review
By contrast, the double basket with its flat base allowed for a more even distribution of water through the coffee grounds. The wider surface area helped prevent uneven extraction, and as a result, my double shots consistently produced fuller, richer flavors. But with the single basket, I had to dig deeper into my techniques and make adjustments to get similar results. Discover the key differences between these two models in our Breville Barista Pro vs Express review

Techniques for Perfecting Single Shots
Eager to master the single basket, I spent several weeks experimenting with different techniques. Through trial and error, I discovered a few crucial adjustments that made all the difference. Below are some of the tips that helped me improve my single shots. Explore the advanced capabilities in our Breville Oracle vs Oracle Touch review
1. Increase the Coffee Dose
One of the first lessons I learned was that halving the dose of a double shot didn't translate to a good single shot. Initially, I thought that using half of my usual double shot dose (around 18 grams of coffee) would be the right amount for a single shot. Unfortunately, this led to weak, watery shots that brewed far too quickly. The espresso lacked depth and complexity, and the flavor was too diluted to be enjoyable.
After some experimentation, I found that increasing the coffee dose to about 10 grams per single shot worked much better. This allowed for better extraction times, more balanced flavors, and overall, a much more satisfying espresso. While it may seem counterintuitive to use more coffee for a single shot, the smaller volume of water in the single basket actually benefits from a slightly higher dose. This adjustment resulted in shots that were fuller and more concentrated, making a big difference in the final flavor profile.
2. Adjust the Grind Size
Another important factor I quickly learned was that the grind size plays a critical role in how a shot pulls. At first, I was using the same grind size for both my single and double baskets. However, I quickly noticed that my single shots brewed far too quickly, indicating that my grind was too coarse. To remedy this, I started dialing in a finer grind for the single basket.
Finer grinds slow down the water flow, which allows for a more even extraction. The goal was to slow down the brew time and ensure that the water had enough time to extract the full range of flavors from the coffee grounds. After adjusting the grind to a finer setting, I noticed a significant improvement in the shot timing and flavor. The shots became richer, with more complex notes, and were noticeably more balanced.
Precision was key, so I began using a scale to weigh the coffee grounds and the output of the espresso. I adhered to a 1:2 brew ratio, meaning that for every gram of coffee, I aimed to extract roughly twice that amount in espresso. For example, with 10 grams of coffee, my target was 20 grams of liquid espresso. Using this ratio ensured that my single shots were neither too weak nor too diluted, resulting in a concentrated and balanced espresso each time.
3. Purge the Grinder Between Baskets
Switching between single and double baskets required extra attention to my grinder. When adjusting the grind for a single shot, I made sure to purge the grinder between basket changes. This was particularly important because leftover grounds from a previous shot could alter the grind consistency, which would affect the flavor of the new shot.
I always took a moment to run some fresh coffee beans through the grinder before changing the basket to ensure that there were no remnants of old grounds left behind. This simple but effective step helped maintain consistency in my shots and prevented any unwanted flavors from seeping into the new brew.
Overcoming Challenges and Enjoying the Outcome
At first, using the single basket seemed like a challenge that I might never overcome. It required more attention, more patience, and a deeper understanding of how my espresso machine interacted with the coffee grounds. The results, however, were worth the effort. Once I fine-tuned my techniques, I was able to create clean, focused shots that had a much more distinct flavor profile compared to my earlier attempts.
Using the single basket became especially rewarding when I started brewing espresso for milk-based drinks like lattes and cappuccinos. The concentrated nature of the single shot worked beautifully in these beverages, where the espresso flavor needed to stand out against the milk. The single shot’s more intense and balanced flavor added a level of refinement to my drinks that I hadn't achieved before.
For those who enjoy a lighter, more nuanced espresso, or those who prefer a single shot for milk-based drinks, these adjustments can really make a difference. Keep in mind that each espresso machine and each type of coffee will respond slightly differently, so it's important to experiment and adjust the grind sizes, doses, and extraction times to suit your taste.
Conclusion
Mastering the single basket on a Breville or Sage espresso machine can initially feel like an uphill battle. The conical design of the single basket, combined with the need for precise adjustments in dosing, grind size, and extraction time, means that perfecting a single shot requires more skill than simply halving the dose for a double shot. However, with patience, practice, and a willingness to experiment, you can achieve beautifully balanced, concentrated espresso shots.
Perfecting the single basket not only enhanced my espresso-making skills but also deepened my appreciation for the art of brewing. There’s a certain satisfaction that comes from pulling a flawless single shot, and the process of learning how to achieve that has been immensely rewarding. I encourage anyone who owns a Breville or Sage espresso machine to experiment with the single basket and embrace the challenge—it’s well worth the effort.
If you’re looking to enhance your espresso-making experience further, products such as the Breville BES870XL Barista Express or Sage Bambino Plus espresso machines are great options to consider. These machines are highly regarded for their performance, user-friendly features, and ability to consistently pull excellent espresso shots. For those seeking additional precision, a coffee scale like the Hario V60 Drip Coffee Scale or Acaia Pearl Coffee Scale can help you measure your doses and output more accurately, ensuring your single shots are dialed in just right every time.
Ultimately, the beauty of espresso lies in the process, and the joy comes from refining your technique. Don't be afraid to experiment, and remember that each adjustment brings you closer to the perfect shot.
